Crown of the Cosmos Heroic Down!
Crown of the Cosmos Heroic Down!
WoW Guild EU progression
We will fight till the last man standing. Literally though 😀
Although this one on Normal felt like a walk in the park, we had to put our big girl and boy pants on to tackle it on HC early in the tier. Quite an enjoyable fight overall, but the key takeaway is this: if you think you’ve prepared enough for Phase 2, you haven’t. That’s where most of your progress will be and, of course, we’re here to help with a list of tips and tricks earned the hard way.
So, let’s begin.
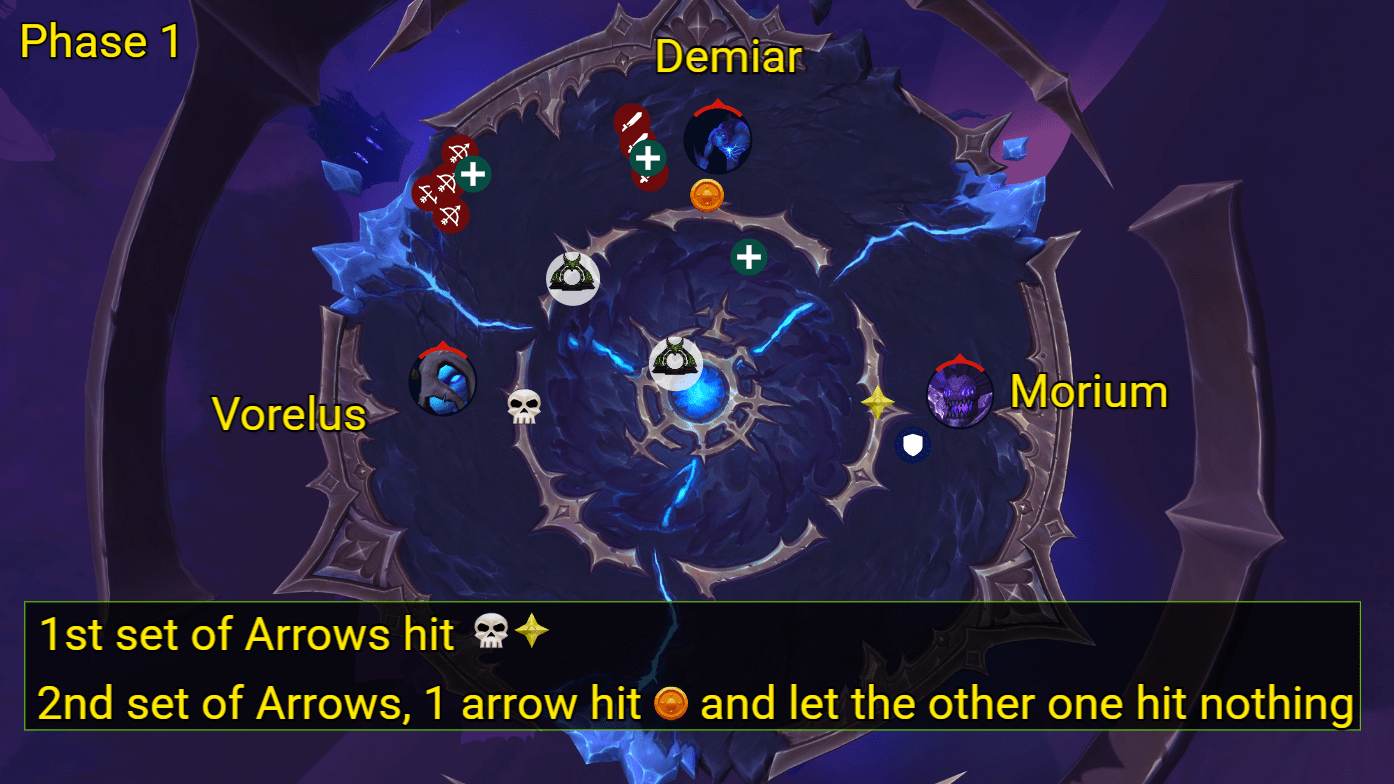
Phase 1
Much simpler than it looks, positioning is everything.
Positioning (see picture)
- One tank starts on Morium, with one healer positioned slightly away from the raid to support that tank.
- The second tank starts on Demiar.
- The rest of the raid positions between Orange and Skull so multidotters can benefit from proximity.
Arrows
- 1st set: hit Skull and Star.
- 2nd set: one hits Orange (finishes Demiar’s shield), the other hits nothing.
IMPORTANT – Void Expulsion
This will cause early problems. What worked for us:
- All ranged start at the edge.
- After the first expulsions, move towards the middle (near the Warlock portal).
- This keeps the initial area clean and gives allows you to be next to the Warlock portal should you need to use it for Silverstrike Arrows.
Once you move to Vorelus, space becomes less of an issue provided the start of the phase was handled cleanly.
To make your melee DPS lives a little less miserable, let them switch to Morium once Vorelus begins casting his second Ravenous Abyss, and have your ranged finish him off.
Intermission 1
- Dodge puddles.
- Get hit by every other Silverstrike Barrage.
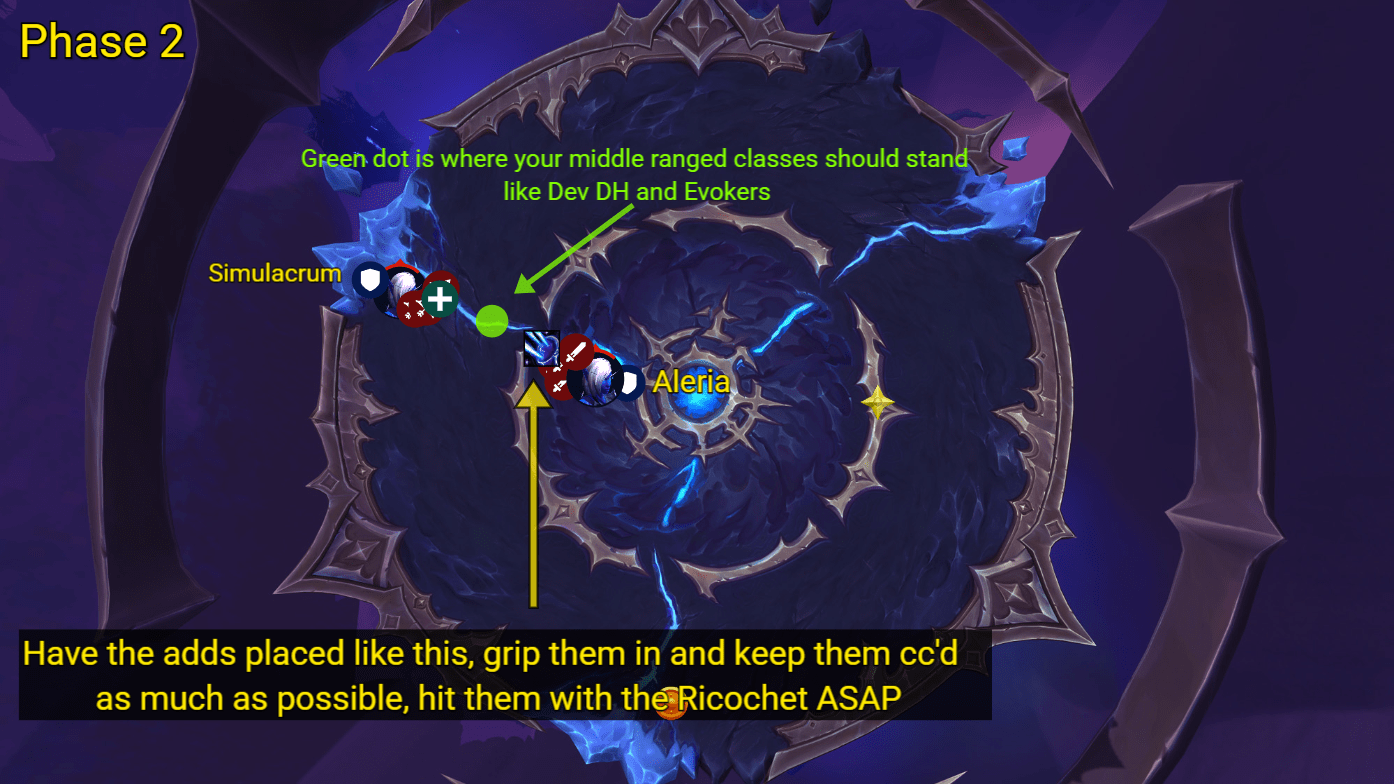
Phase 2
This is where the fun part begins and where most wipes will happen.
1–2 Death Knights are highly recommended for add control (grips are huge here).
Positioning
Please refer to the image for the starting positioning in Phase 2, and adjust as needed as the field fills with void expulsions.
IMPORTANT
- Everyone must understand Silverstrike Ricochet, it is critical that it hits the adds.
- Do not move or interrupt adds during Ricochet, any last-second movement will likely cause a wipe.
Tanks
- Adds get empowered near the simulacrum.
- If needed, delay taunts until adds are cleared.
DPS Priority
- Ranged DPS should focus Aleria. Melee, due to positioning, will DPS whatever is closest to them, with extra focus on the adds.
- Swap to the Simulacrum only to break shields. Melee should only swap if the Simulacrum is within range.
- If Simulacrum is ≤15%, ignore shield and continue on Aleria to finish both.
You will spend most of the time progressing Phase 2 but once everything falls into place the rest of the fight is much easier.
Intermission 2
- Dodge orbs.
- Get hit by every other Silverstrike Barrage.
IMPORTANT
- Stay together and end on the same platform for Phase 3.
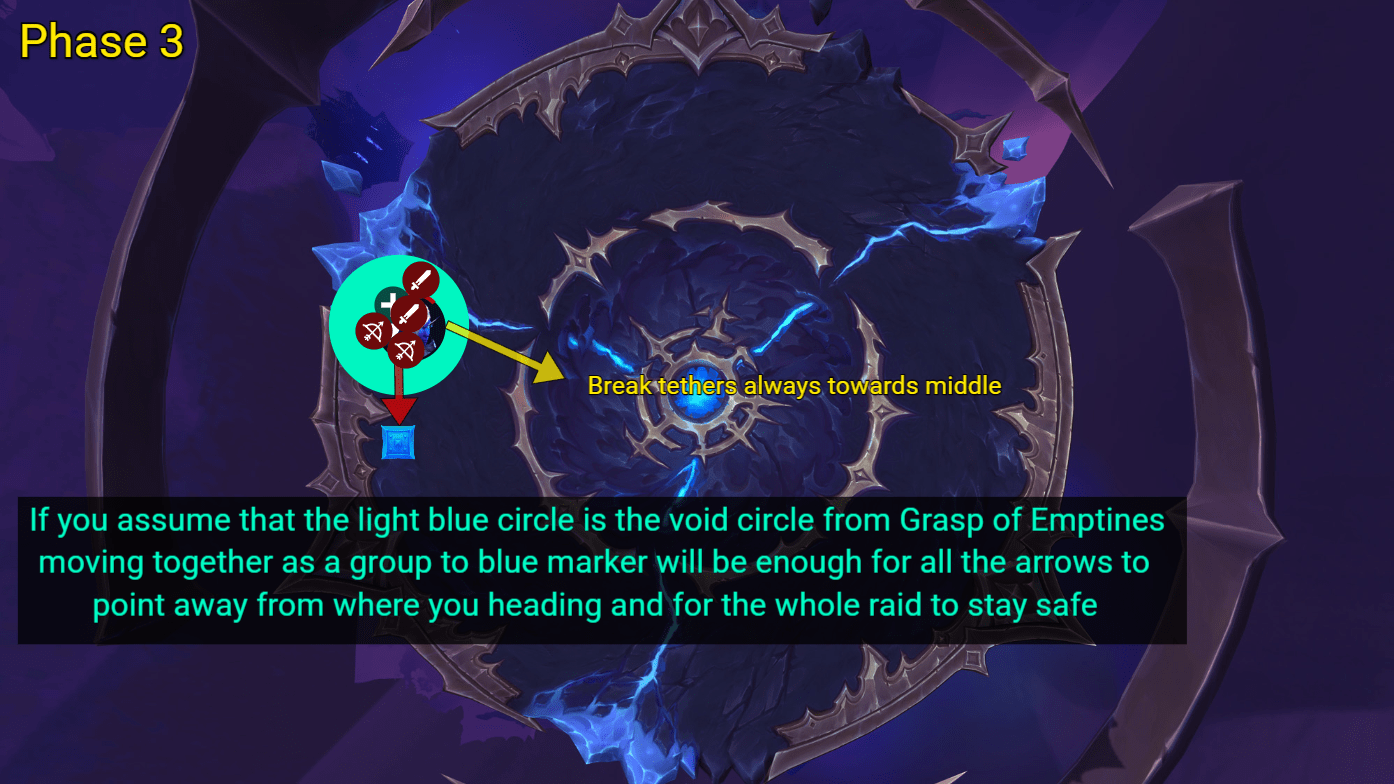
Phase 3
- Stay stacked at all times.
- Decide movement direction (clockwise or counterclockwise) and commit to it.
Grasp of Emptiness (Obelisks)
- Move as a group, only a few yards past the void zone there is no need to move more than that.
Aspect of the End
- Players that are targeted with Aspect move towards the middle to break your tethers, Aspect frequently overlaps with obelisks, and you do not want to run the risk of placing an obelisk ahead of the raid (see picture).
For guides and updates on our progress, follow us on social media:
Facebook:
https://www.facebook.com/GordianKnotEU/
https://www.facebook.com/groups/gordianknot/
Twitter:
https://x.com/GordianKnotEU
Instagram:
https://www.instagram.com/gordianknoteu/
TikTok:
https://www.tiktok.com/@gordianknoteu
If you’re looking to join one of the most active and friendly mythic raiding, World of Warcraft EU guild, feel free to apply here, or join our Discord and reach out to anyone with the rank of Officer or higher. We’d be delighted to welcome you to our ranks!
Also here’s a link from wowhead.


Add Comment
You must be logged in to post a comment.